Hello everyone! We here at Scrapbook Essentials BC just love the 49th & Market products! So much so, that for all of our Shabby Chic card classes, with the exception of the first two, have been created with their product.
Today I am posting for our 6th Shabby Chic class, and showing you the photos and class information. So here are the two cards we will be creating in class.
Shabby Chic Class # 6
When: Thursday, August 24th
Time: 6:00 - 8:30
Cost: $30 + GST
To register for this class, email Stacey at - sbebc2011@gmail.com
For this Shabby Chic card class we will not be using as many layers like we have in the previous classes, but we will be using some of the 49th & Market stamp sets more. These may even be mailable Shabby Chic cards! We will also be cutting parts of the image with a craft knife and tucking in some distressed cheese cloth. The 49th & Market stamp sets we will be using in class are, Gabi's Crackle Texture set, Gabi's Line Stitch set, & Gabi's Word set. Stacey has these in store now!
There will, as usual, be fussy cutting homework for this class.
Please bring to class: paper distresser, gesso, paint brush, Iced Spruce Distress ink pad, Tattered Rose Distress ink pad, Gathered Twigs Distress ink pad, a clear narrow stamp block at least 6" long, stamp cleaner if you are buying and using the stamp sets listed in the class description, ink blending sponge/tool for each colour, craft knife & cutting mat, scissors, double sided adhesive, mini-glue dots, liquid glue, & a non-stick craft mat.
So the class info is now done, let's have a closer look at the cards. Remember, these ones do not have a lot of layers. They are more an easy version of Shabby Chic.
I love the silver metal doillie and silver metal leaf embellishments, nestled in the cheese cloth, on the this card. I also love the soft green/blues of the paper.
Next we have a pink card!
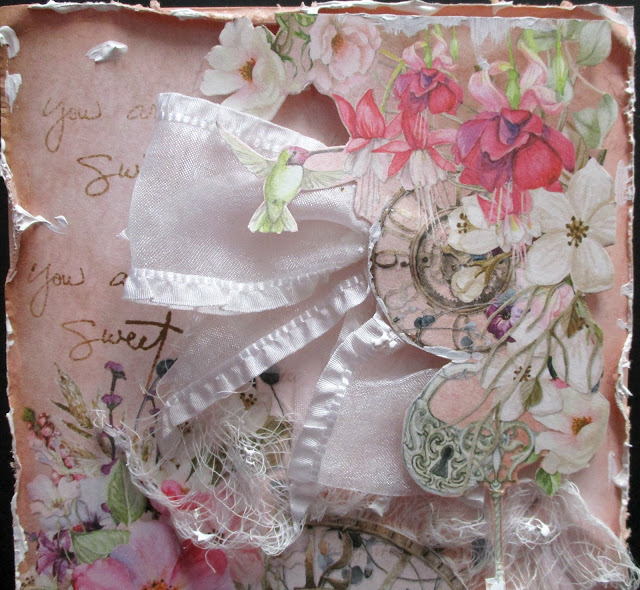
For this card we are doing something a little different. the larger clock you see at the bottom has been cut around the outer edge with a craft knife and distressed cheese cloth is stuffed just inside and adhered down. You might be able to see it better in the close up, next.
While I am posting these photos, I am beginning to think I should have added a little more cheese cloth under the white bow. Well, I will suggest it in class and see if anyone will decide to do that.
Well, that's it for today. Till next time, happy creating!


No comments:
Post a Comment