-Due to the many requests I'm posting this tutorial. Thank you for the wonderful comments.

This is the card that many requested measurements for.
This particular Double Sided Step Card was designed for A7 envelopes. Since the writing space in the interior of the card is much less than usual I wanted to have it large enough so that a person could have enough space to write a little something.
To begin with the best cardstock to use for the base of these kind of cards is heavyweight 100# cardstock. If you are using a lighter weight cardstock, cut two pieces and after cutting & scoring them both, but before folding, adhere the two together with Scor Tape all around the edges and on either side of the cut lines. This will help give the added stability needed to keep the card standing without the base spreading apart until it practically lies flat. If every fold is pressed well using a bone folder, that will also help the card with stability.
Another hint - if you never have made a step card before you can practice making it with lightweight cardstock before using your good stock.

1)Cut the cardstock (heavy) to 7" x 10"

2)Place length (10") vertically on your paper trimmer and place left edge on the 4 3/4" line with the blade at the 1" mark on the ruler. Press down and cut down to the 8 1/2" mark on the ruler of your trimmer.

3)Slide the left side of the paper to the right and position the left side on the 2 1/4" mark, and as the first time, with the blade at the 1" mark on the blade ruler, press down and cut down to the 8 1/2" mark on the ruler as below.


4)Now place the piece on your score pad with the 10" horizontally across the top and score between the cut lines at 1" score. Remember to score only between the cut lines.
 5)
Score only between the cuts at 1", 2", and 3 1/2". At 5" score right through from the top down through to the bottom end. Then back to scoring only between the cut lines at 71/2" and 81/2".
5)
Score only between the cuts at 1", 2", and 3 1/2". At 5" score right through from the top down through to the bottom end. Then back to scoring only between the cut lines at 71/2" and 81/2".
Using a ruler may help you to get the correct lines when scoring between the cut lines.


Here is a photo where I've taken a pen and drawn all the cuts with solid lines, folds with dotted lines, and included all measurements.

6) When folding, DO NOT FOLD the 8 1/2" score line. That is there just for a little give. So the score lines are folded as 1" - mountain, 2" - valley, 3 1/2" - mountain, at 5" the sides are mountain, but middle section is a valley, & 71/2" - mountain.


When all folded, the card should be 7" x 5" (A7).
If you are wondering about how I got the butterflies to float, I cut three clear strips of plastic sheet at 1/4" and attached them at varying heights, trimming the strips accordingly. You could use flowers, dragonflies, numbers, letters, clouds, birds, etc in like manner.
One happy paper crafter that requested the measurements for this Double Sided Step Card is having her birthday in a day or two, so I want to say to her, "Have a very happy birthday!"
Thank you for joining me today for this tutorial. Let me know something doesn't make sense to you and I'll try to clarify it for you.
Have fun!!

 Added February 2, 2014

This is the card that many requested measurements for.
This particular Double Sided Step Card was designed for A7 envelopes. Since the writing space in the interior of the card is much less than usual I wanted to have it large enough so that a person could have enough space to write a little something.
To begin with the best cardstock to use for the base of these kind of cards is heavyweight 100# cardstock. If you are using a lighter weight cardstock, cut two pieces and after cutting & scoring them both, but before folding, adhere the two together with Scor Tape all around the edges and on either side of the cut lines. This will help give the added stability needed to keep the card standing without the base spreading apart until it practically lies flat. If every fold is pressed well using a bone folder, that will also help the card with stability.
Another hint - if you never have made a step card before you can practice making it with lightweight cardstock before using your good stock.

1)Cut the cardstock (heavy) to 7" x 10"

2)Place length (10") vertically on your paper trimmer and place left edge on the 4 3/4" line with the blade at the 1" mark on the ruler. Press down and cut down to the 8 1/2" mark on the ruler of your trimmer.

3)Slide the left side of the paper to the right and position the left side on the 2 1/4" mark, and as the first time, with the blade at the 1" mark on the blade ruler, press down and cut down to the 8 1/2" mark on the ruler as below.


4)Now place the piece on your score pad with the 10" horizontally across the top and score between the cut lines at 1" score. Remember to score only between the cut lines.

Using a ruler may help you to get the correct lines when scoring between the cut lines.


Here is a photo where I've taken a pen and drawn all the cuts with solid lines, folds with dotted lines, and included all measurements.

6) When folding, DO NOT FOLD the 8 1/2" score line. That is there just for a little give. So the score lines are folded as 1" - mountain, 2" - valley, 3 1/2" - mountain, at 5" the sides are mountain, but middle section is a valley, & 71/2" - mountain.


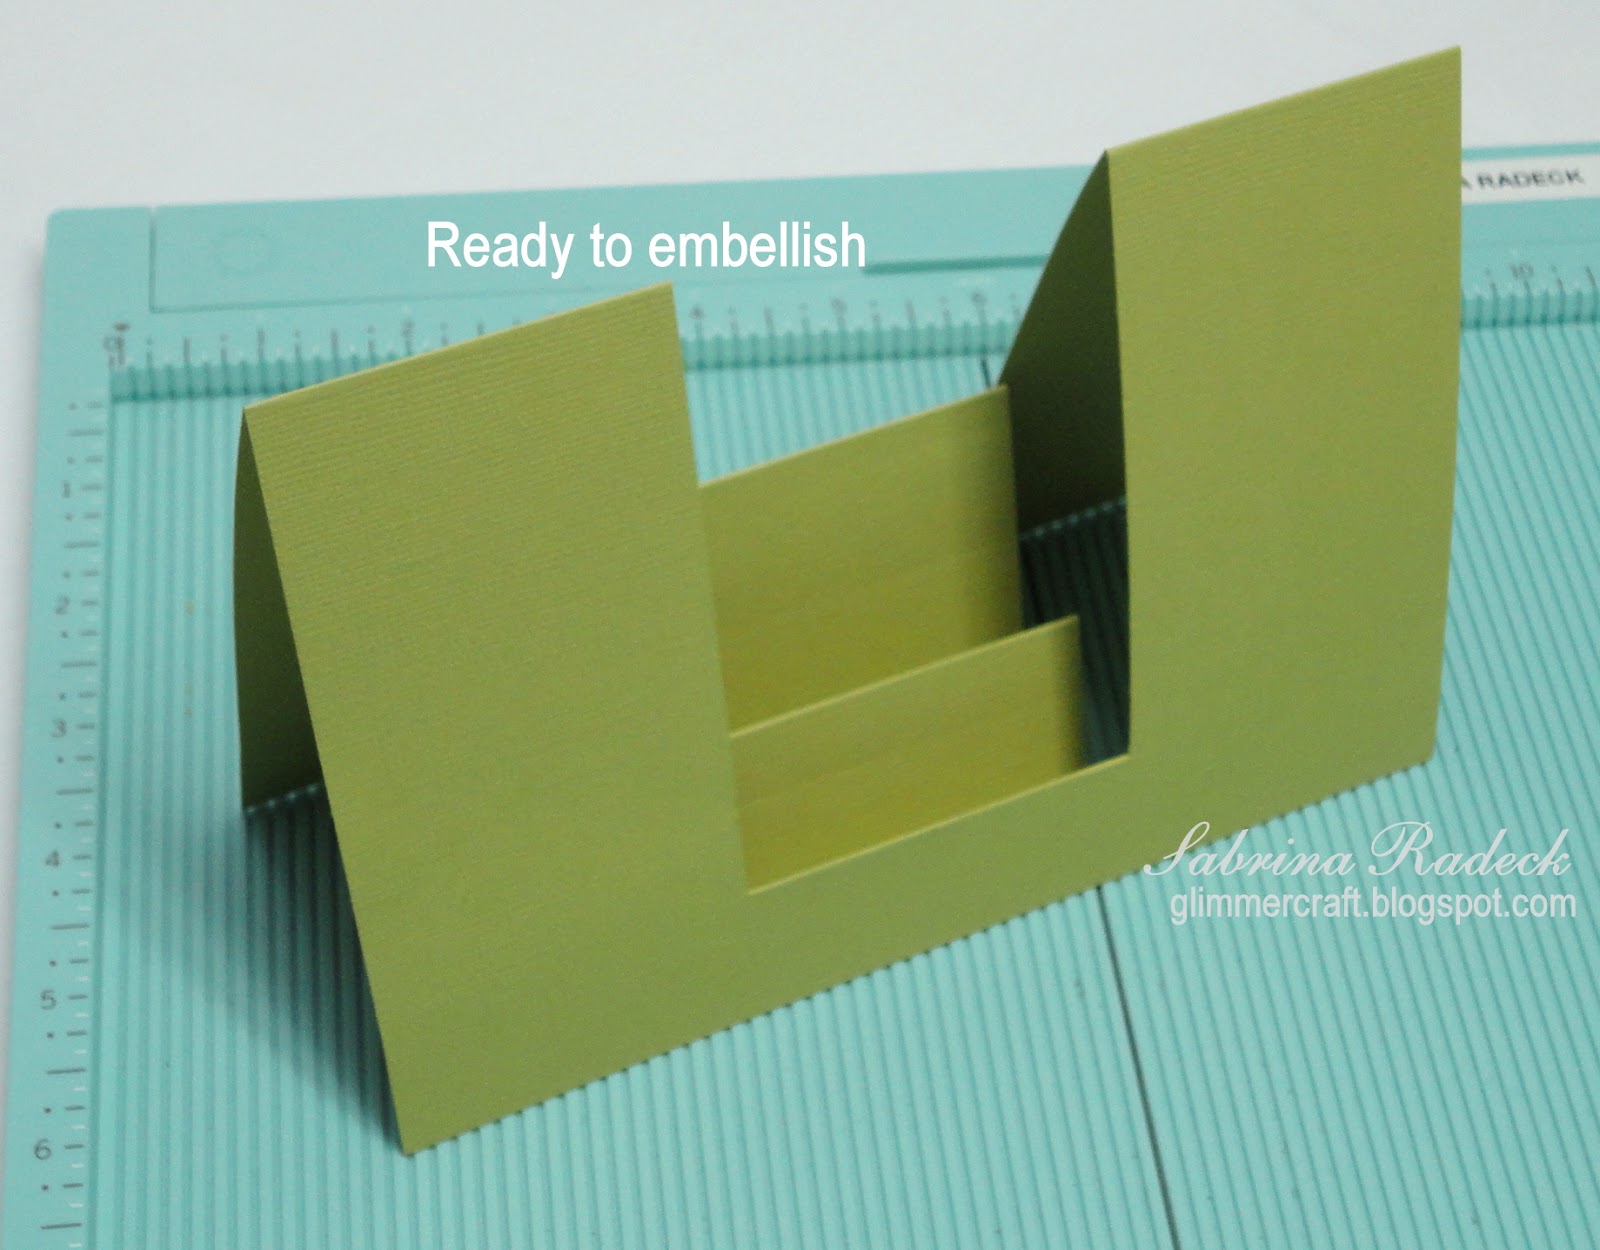
When all folded, the card should be 7" x 5" (A7).
If you are wondering about how I got the butterflies to float, I cut three clear strips of plastic sheet at 1/4" and attached them at varying heights, trimming the strips accordingly. You could use flowers, dragonflies, numbers, letters, clouds, birds, etc in like manner.
One happy paper crafter that requested the measurements for this Double Sided Step Card is having her birthday in a day or two, so I want to say to her, "Have a very happy birthday!"
Thank you for joining me today for this tutorial. Let me know something doesn't make sense to you and I'll try to clarify it for you.
Have fun!!
 Added February 2, 2014
This tutorial was published in the online magazine at "Through the Craftroom Door".


31 comments:
Sabrina thank YOU! Yes, you made this almost-birthday girl's day! :-)
Sabrina me encanta tu trabajo y creatividad, muchas gracias por el tutorial, un abrazo!!!
Wonderful tutorial and I love the butterfly cards. Great job!
This is gorgeous!
Thank you so much for such an easy to understand tutorial. It is really appreciated
good afternoon i seen the double sided step card tuterial on pinterest and they are so pretty . im also looking for the single sided step card tuerial would you have that . llove your card ideas ,Thank you for share your card ideas. Have a sunshine day. please get back to me. thank you .
Thank you for sharing this tutorial, I'm so going to try it. It's amazing!
www.prettycraftypumpkin.weebly.com
I just love this card! Thank you so much for the instructions. Could I ask what stamp you used for under the butterflies? Thanks again,
Sandy
Wow! You made this sooo simple! Thanks so much
Thank you everyone for your sweet comments. I apologize for not replying sooner for some of you, but you'll never guess why? Today, April 10, 2014, I received about 20 email notifications of comments made on the blog from quite a while back! I can't quite figure out why it took so long, but that's what happend! lol.
Sandy, as to the flourish stamp, I don't know if it is still available. It's an old set from "Close To My Heart", and I don't know the name of the set. Sorry.
CoysGran, Thank you for your sweet comment.
hugs to you all
Sabrina
Deborah James, I'm so sorry that I didn't reply to the question you ask in your comment, but I just received email notification of your comment today, April 10, 2014! Can you believe that? I sure can't figure that one out.
Any way, as to your question about a single side step card tutorial, there are many of them out there on YouTube, but I'd be happy to add one to them all if you wish. I have do however, have to get my current list of projects completed first. So maybe sometime in June? Hope that's OK with you.
Hugs
Sabrina
Thank you for this wonderful tutorial,.
bellissssssimooooooooooooooooooooooooo
Thanks so much for this great tutorial. Your samples are so cute.
Śliczna ta kartka z motylami :-)
Truly wonderful and easy to understand and follow. Thanks very much for your work for us.
Merry Christmas from Kathrin from Switzerland
This is so beautiful. Will definitely try. Thank you for sharing!
Oh Wow What a beautiful cards. Thank you for the tutorial Sabrina.
There needs to be a cut file for this! Wow! Great tutorial thou!!
Beautiful, thanks for tutorial!
This is stunning! How did you get the butterflies in the middle to stand up? I can't seem to figure that one out.
Thanks,
Debbie
Thanks for the tutorial ;)
Thank you for sharing this. I have been looking for the pattern for this type card and did one with just one fold and I aced that so this is just wonderful that you have given all the dimensions. Thanks again.
Mstgane
Ann
Your card is gorgeous...I'm going to give it a try. Could you please tell me the name and company of the butterfly stamps. Thank you so much!!
can you give me the measurements in millimeters? i struggle to understand what 4 3/4 is i understand 1/2" and of course basic inches as 1" and such i just dont understand where 3/4" is on my ruler and cutter. Beautiful card though i really want to create one!
I have a question (if it's not too late to ask) ...How'd you get the butterflies in the example picture at the top of the page/photo to 'float' in mid air like that are they on acetate or attached to the sides? Anyone help with this please?
BritCurl800, The butterflies are on clear acetate strips at different heights attached to the back of the second step.
Thank you for the clear and concise instructions for making this type of card. I so greatly appreciate it. The way, in which, you decorated the card is absolutely gorgeous and not overdone.
Just brilliant and so generous of you to share with us. Thank you so much! Regards Sue
Thank you for being so sweet and sharing this tutorial!! I really appreciate it!
Thank you so much for sharing, what a gorgeous stepper template! I will be using this for some of my Christmas cards this year! Xx
Post a Comment