I just love working with this paper! I wish I could keep making more projects and layouts with it.
Hi everyone! Thank you for stopping by to have a peek at this latest Graphic 45 Bird Song project for a Scrapbook Parade class. For this project we'll be making a photo shadow box.

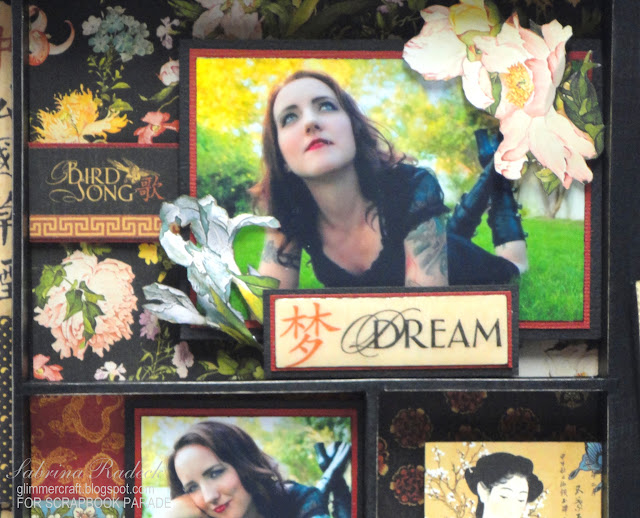
I used a few of the photos my youngest, 24 year old, daughter had from a professional photo shoot this last Fall. (A chance for me to brag...she's a fantastic and also creative welder) She tends to always wear black and quite often along with red, so I thought the colours she wears would work well with the Bird Song colours. Little did I realize that the green grass and other greenery would print so brightly. I worked with editing the photos the best I could and they are lighter than they originally printed.
So lets take a close-up tour and I'll make a few comments.

This is the theme section and is without a photo. With the exception of the Japanese calligraphy background, everything it popped u with dimensionals anywhere from one layer to four layers. I created the key hole cutting chipboard with the Tim Holtz die Hardware Findings and heat embossed it with god. While the embossing was still hot I imprinted it with a clear stamp to give it a metal embossed look.

Even though this image is blurry, maybe you can see the popped up layers a little better in this angle.

The left side has the smaller matted photos. I used Bazzill's Cajun cardstock along with one of their many blacks.
I used a combination of fussy cut flowers from one of the 8 x 8 papers and flowers from Prima in the embellishing of the tray shadow box.
All the fussy cut flowers are backed with foil adhesive sheets, which I just love! It makes fussy cutting soooo much easier! It's faster, and helps prevent tearing while you're cutting, plus after it's cut out the piece is nicely shapable. I'll have some close ups later that hopefully you can see a little of the shaping.
Lets go on to some more close ups, shall we.

It's too blurry to see the shaping and bending I did with the blue iris I fussy cut out here.

I had a lot of fun making this little scroll for the third box in the tray. I edged the paper with Memento Tuxedo Black and rolled the strip tightly, securing it with Scor Tape, and then tying knot in the ribbon. It was then glued down with Scotch Quick Dry Glue. Love the stuff!
The white and red rosettes, I used an ink blending tool and Tim Holtz's Tea Dye ink to change the colours.

In this section, I created a fan, gold embossed the laser cut chipboard key, added a handmade black embroidery floss tassel, attached a fussy cut and shaed flower as well as some of the Prima rosettes.

The right side of the tray shadowbox has some larger photos. Again everything is layered with varying heights of dimensionals (pop dots), as well as some of the gorgeous fussy cut flowers backed with the foil adhesive.
If you look hard enough you may be able to see the bending and shaping of the flowers.
You will see on this side I included the word strips found on one of the 12 x 12 sheets used for this project. "Happiness" & "Love" are backed with black chipboard as they needed extra strength. but all hare layered with the Cajun and black cardstock and have been covered with Glossy Accents.

On the right side of the shadow box, you may have noticed a hinge (partial hinge actually - one side of it) with some pieces hanging from it. They are all backed with black chipboard for added strength and have been punched with a hole at the to and some with an additional hole at the bottom to either attach another of my handmade tassels or another chipboard piece.
I have some other personal metal embellishments that I will add later, after the class has been taught.
The next photo I was hoping would show better the bending of the foil backed fussy cut flowers, but again the photo is too blurry for that.

Thank you for stopping by to check out this latest project, and I hope you have been inspired to create your version of a Graphic 45 Bird Song photo shadow box.
Happy crafting!
For those Scrapbook Parade class participants, there is a class list of things to bring at the very end of this posting.

VICTORIA SCRABOOK PARADE CLASS
This is what you will need for class:
-Paper trimmer (make sure your blade is sharp)
-scissors
-a pair of old
larger scissors to protect your good ones
-pencil & eraser
-ruler
-quick dry glue
-black pop dots & thick pop dots with a black marker
-double sided tape or adhesive
-Tim Holtz Tea Dye ink
-ink blending tool
-Glossy Accents
-black marker
-black ink pad
-Versa Mark ink pad and
Versa Mark pen
-fussy cutting scissors if you have
-wipes or wet cloth
for hands


2 comments:
Very cool, Mom! Lerina will love this! (Does she know??)
She may guess if she sees her photos on this project. I wanted to surprise her, but it may be impossible to keep it so. ;)
Post a Comment